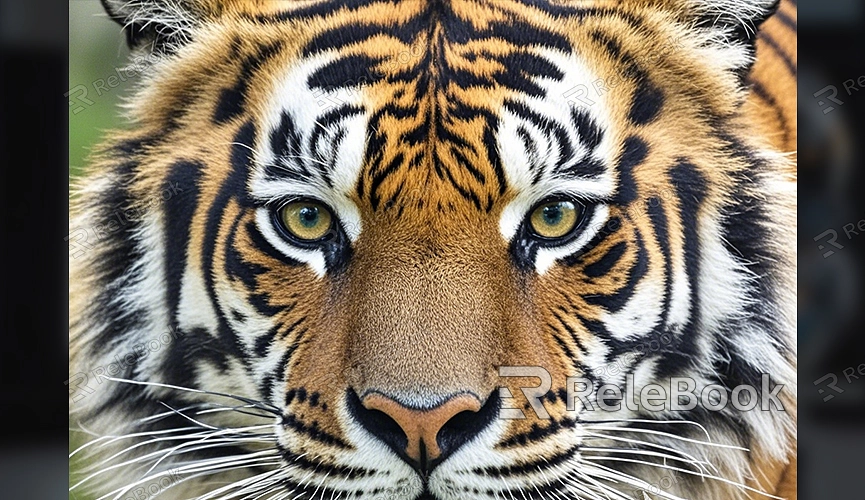
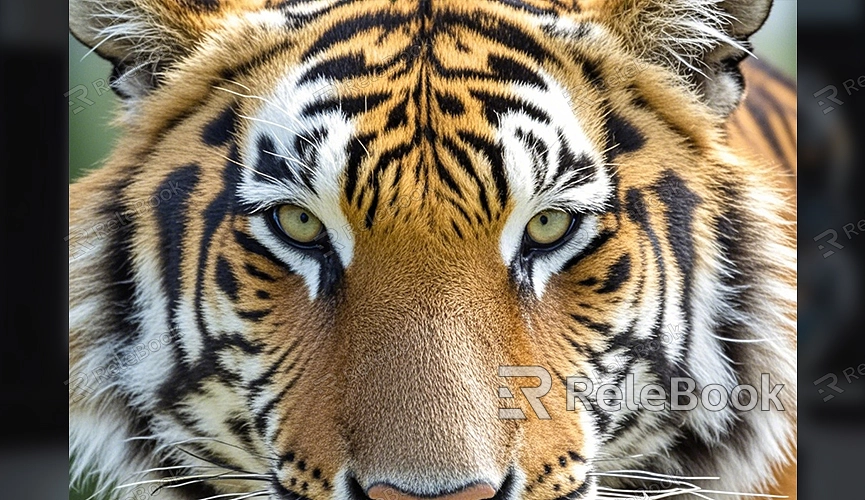
How to render animal eye blender
In 3D modeling and rendering, creating realistic animal eyes can be one of the most challenging aspects. As a crucial focal point, the eyes need to display both intricate detail and a lifelike sheen. In particular, how you handle the eyes in an animal's 3D model can greatly affect the model’s overall realism. When rendering animal eyes in Blender, special attention must be given to materials, lighting, and reflections. This article provides a comprehensive guide on modeling and rendering animal eyes in Blender.
1. Creating the Basic Structure of Animal Eyes
Start by modeling the basic structure of the animal's eyes using two spheres: one for the cornea and another smaller one for the iris and pupil. Follow these steps:
1. Create two spheres in Blender: a larger one for the cornea and a smaller one for the iris and pupil.
2. Apply a transparent material to the cornea sphere, and assign appropriate color and texture to the iris sphere.
3. The pupil can be modeled as a deep black void within the iris sphere.
2. Adding Details to the Eyes
Details make a difference. Texture details are particularly important in creating animal eyes. Add textures to the iris to showcase its complex structure and color variations. To better represent these details, use Blender’s material editor to add layers through textures and nodes. High-quality texture images are recommended to enhance the realism of the eyes.
When rendering animal eyes, choosing the right textures is crucial. For high-quality 3D textures and HDRI, you can download free resources from [Relebook](https://textures.relebook.com/). High-quality textures will better capture the layers and sheen of the eyes.
3. Setting Up Materials and Lighting
The materials for the eyes should mimic real optical effects, especially the refraction and reflection of light on the cornea and iris. Set up the materials in Blender as follows:
1. Cornea Material: Choose a “Glass” or “Transparent” material type and set an appropriate refraction index (usually between 1.33 and 1.35).
2. Iris Material: Use the “Principled BSDF” material, adjusting reflections, roughness, and glossiness to achieve rich colors and reflective effects.
3. Pupil Material: Use a simple black material with minimal reflections.
Lighting is also critical for rendering eyes. Set up an environment light source and a main point light source in the scene to simulate natural reflections and refractions on the eyes.
4. Rendering Settings
Once the materials and lighting are set, proceed to rendering. Using Blender’s Cycles rendering engine will provide better light and reflection effects. Adjust the settings as follows:
1. In the “Render Properties,” select Cycles as the rendering engine.
2. Adjust the intensity and direction of the lighting to create natural light spots on the eye surface and enhance glossiness.
3. Increase the sampling rate to reduce noise and improve rendering quality.
5. Post-Processing
After rendering, use Blender’s compositor for post-processing the image. Adjusting contrast and brightness can make the eyes appear more prominent and deeper. Adding small highlight reflections can also bring more life to the eyes.
Rendering animal eyes in Blender requires meticulous attention to detail and lighting effects. From modeling the eyes to setting up materials and final rendering, each step needs careful adjustment and refinement. Realistic textures and appropriate lighting effects significantly enhance the eyes' realism, making your animal model more vivid.
For high-quality 3D textures and HDRI, download free resources from [Relebook](https://textures.relebook.com/). If you need exquisite 3D models, Relebook also offers a wide range of premium resources available for download [here](https://3dmodels.relebook.com/). We hope this article provides useful guidance for rendering animal eyes in Blender.
